
Xiaomi Redmi Note 9 USB Driver helps to build a smooth connection to recognize your Xiaomi phone to the computer, If you want to transfer files from your phone to computer, Or, trying to flash or update your phone to the latest Android OS, Then these step-by-step instructions will help you to download and install Xiaomi Redmi Note 9 USB Driver to overcome the situation.
USB Drivers ensure the connection when you try to connect two different hardware. So, download and install the Xiaomi USB driver for transfer data, root, flash, Install updates, install custom and stock Rom and files, and also for backup, restore data.
Xiaomi USB Driver Software is fully compatible with every version of Windows OS. Such as: Windows 10 (32 & 64 bit), Windows 8.1 (32 & 64 bit), Windows 8 (32 & 64-bit), Windows 7 (32 & 64-bit), Windows Vista (32 & 64-bit), and Windows XP (32-bit). Always remember: Download and install the Official USB driver for your particular device brand and model to avoid common USB connection error.
More: Download Official Xiaomi Poco X3 USB Driver [2021] 100% Tested for Free
Download Xiaomi Redmi Note 9 USB Driver
Driver File Name: Xiaomi Official Qualcomm Driver
File Size:20MB
Download: Xiaomi Qualcomm Driver
Password: Mobileusbdriver.net
Driver File Name: Xiaomi ADB Driver
File Size:10MB
Download: Xiaomi ADB Driver
Password: Mobileusbdriver.net
How To Install Xiaomi ADB Driver Properly
1=>> Download and unzip the Xiaomi ADB Driver to your computer.

2=>> Open Device Manger =>> Right Click on My Computer =>> Manage =>> Device Manager

3=>> Goto Action =>> Click on Add Legacy Hardware =>> Next

4=>> Select Install The Hardware That I manually select from a list (advanced)

5=>> Click Next
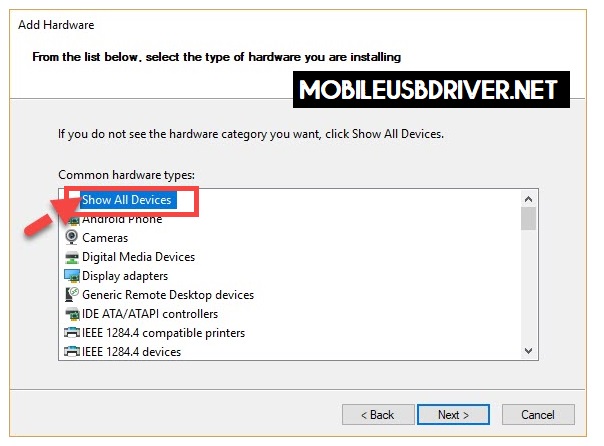
6=>> Choose to Show all devices 7=>> Click Next

8=>> Select Have Disk.
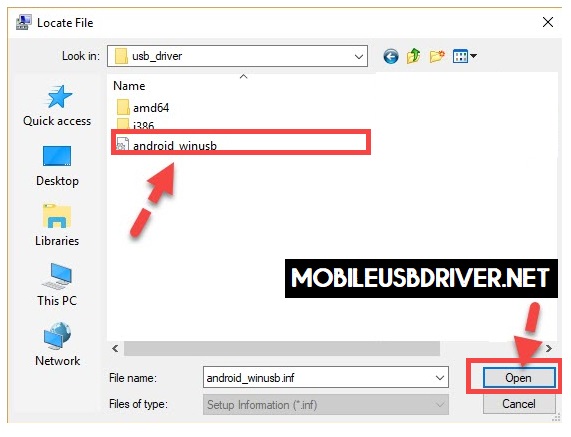
9=>> Click to Browse10=>> Open the extracted USB driver folder =>> and choose Android_winusb and click Open

11=>> Tap OK to Continue
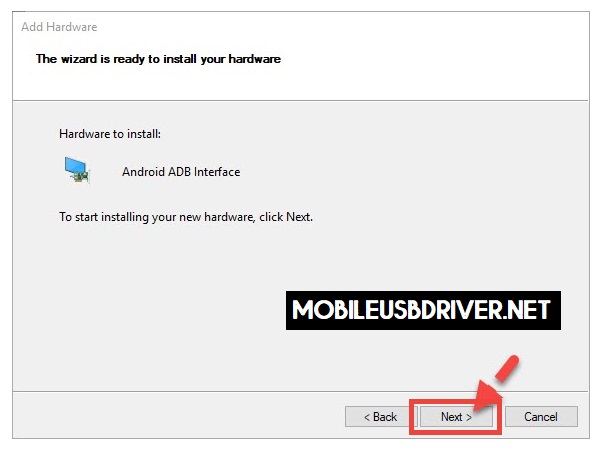
12=>> Select Android ADB interface 13=>> Click Next

14=>> Again click Next15=>> Click Finish That’s it, you have successfully installed Xiaomi USB driver to your computer.
How To Install Xiaomi Qualcomm USB Driver Properly
1=>> Download and extract the Xiaomi Qualcomm USB Driver to your computer
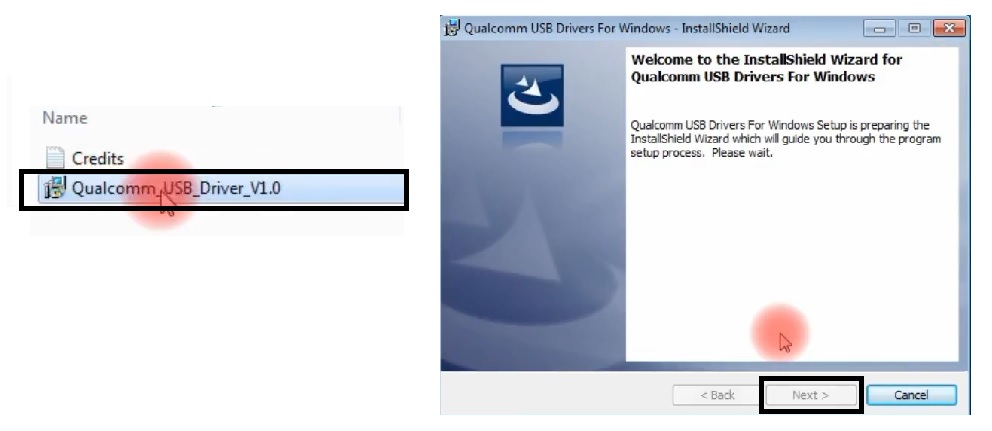
2=>> Open the folder and Run QualcommUSBDriver Setup.exe file

3=>> Select, WWAN DHCP is not used to get IPAddress And select Next
4=>> Click Next => Next

5=>> Select I Accept the terms in the license agreement

6=>> Click Next =>> Next

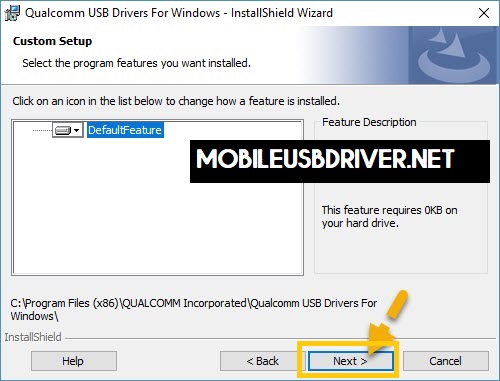
7=>> Click Install To Begin The Installation process
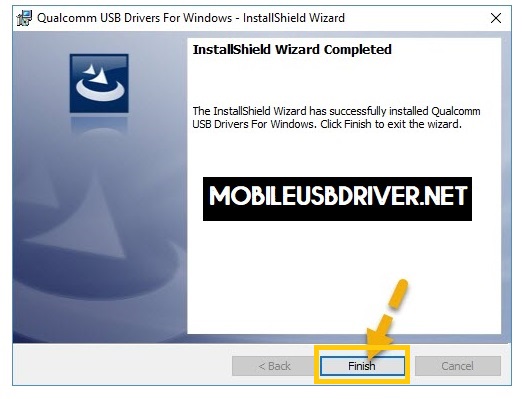
8=>> Tap Finish
9=>> That’s it, you have successfully installed Redmi Note 9 Qualcomm USB driver to your computer.
Fix Third-Party INF Does Not Contain Digital Signature:
If you face the problem of digital signature errors while installingthe driver, then follow these process to fix the problem quickly.
- Run the Windows Command Prompt with Administrator Permission.
- Copy and Paste the following Code: bcdedit /set testsigning on
- Restart your Windows Computer.
- You can see the “Test Mode” is enabled on Windows.
- Now, Install the USB Driver on your computer.
Read More: Download Official Xiaomi Poco M2 USB Driver [2021] 100% Tested for Free